matchy-matchy

One of the things I really loved about making the sleepsack from the last post was finding piping and buttons that made a smooth match to the multi-coloured fabric. Taking the effort to find the thing that’s just right, even if it’s a tiny detail, really makes a difference to the finished object.

I quickly learned that there is a danger to matching, though: once I start, I cannot stop. Before I knew it, there was a perfect tiny hanger to match the piping. Then I thought: well, sewing is all good, but in my deepest of hearts I’ll always be a knitter first, so surely this baby must get something knitted from me as well. Thus a newborn sweater was born. In a matching colour, of course.

Then one day I was walking around one of my favourite shops, and spotted a most adorable pair of baby pants that would just go sooo well with it all.

I would have gone on (don’t you agree that this ensemble is just crying out for a matching hat? and all babies need booties to keep their feet warm, right?), but luckily the baby cut me off by deciding to arrive a few weeks early. I am grateful to him for that. He doesn’t know it yet, but he saved me from going even further down the rabbithole.

Now, of course this doesn’t mean I’m done knitting for him! But maybe I’ll explore some other colours too… ;)

Pattern: Newborn Tristan by Mer Almagro
Yarn: Anny Blatt Flanelle Merinos
Baby pants: Hema

baby sacks are the best

Back in August last year, a very very dear friend of mine and her husband invited me to dinner at their house and then proceeded to announce they were expecting their first baby (doesn’t it seem like all my blog posts lately start like this?). Of course, I was thrilled for them, so thrilled in fact that I sprung into action immediately the next day (once I had recovered from the hangover from all the wine with which I had toasted their news). As it was going to be a peak-of-winter baby, I had no doubt as to what I wanted to make first.

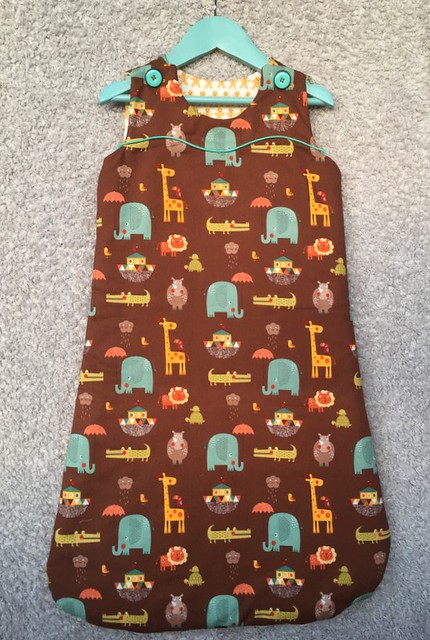
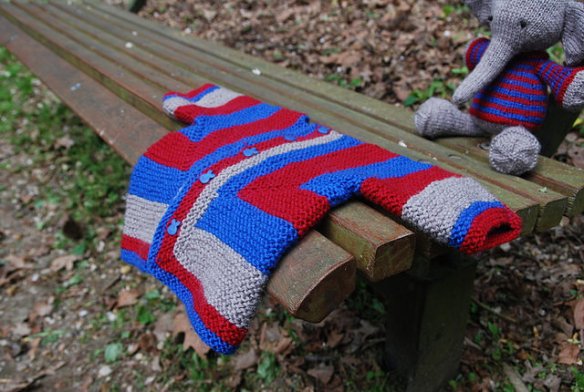
The Lua Sleep Sack had been a raving success the first time I made it, and to be honest it’s so much fun that I want make it for any baby I know! (Only some of them insist on being born at times of the year where four layers of fabric and two of wool may not be totally appropriate.) In fact, the moment I finished this one, I went straight to the shop and bought a stockpile of organic wool batting for when the next opportunity to make this pattern arises.

Even though the pattern is fairly simple (only three different pattern pieces to cut out), it provided plenty of opportunity to work on honing some sewing skills, and I’m quite proud of several of the things I achieved here.

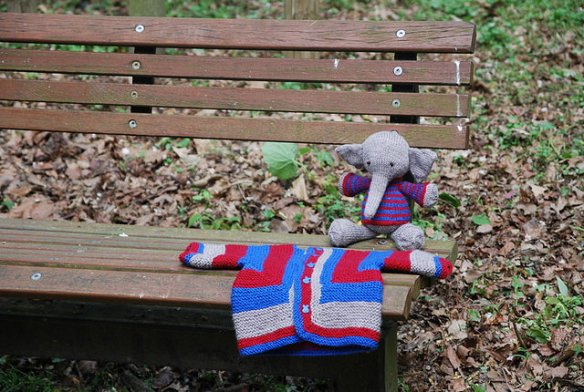
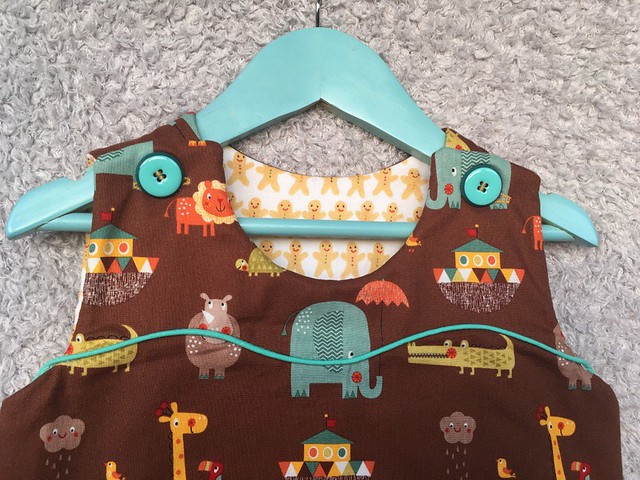
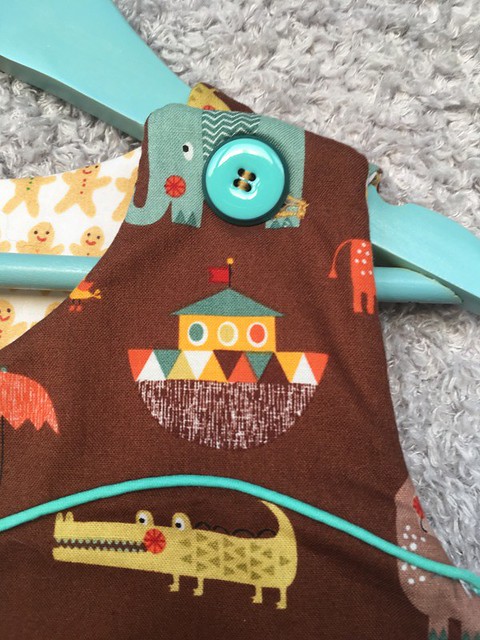
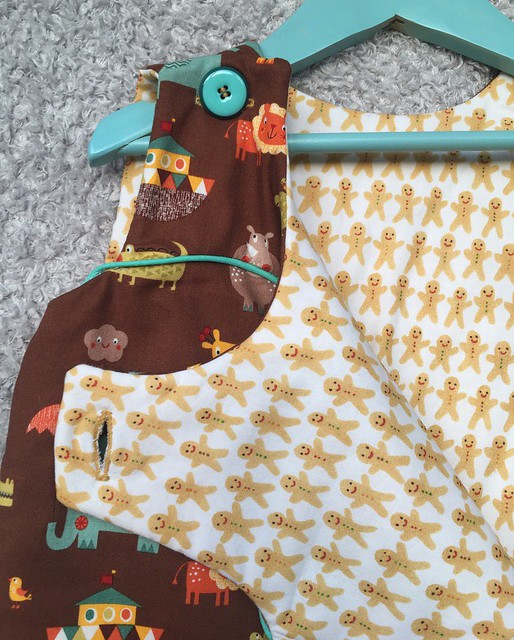
Firstly, the smooth curve of the piping (which came out much better than the first time around), and more importantly, the fabric pattern matching I managed to achieve around the piping. I don’t want to brag, but I mean, just LOOK at that elephant and that hippo! I dare say even the formidable Patrick Grant of the Great British Sewing Bee would not object to its execution. It probably took me as much time as all the other steps of the pattern together, but by gosh it was worth it.

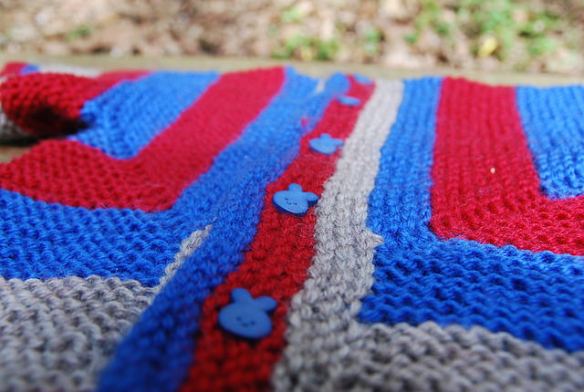
Secondly, I managed decent buttonholes. Not the most advanced of skills, but seeing that we’re talking about 6 heavy layers needing to be fed into and pulled by the sewing machine here, and the high risk of things getting messy beyond repair at the very last step, it is one of the most stressful steps of this pattern. This time I even tried out sewing on buttons by machine, and it was so easy and quick!

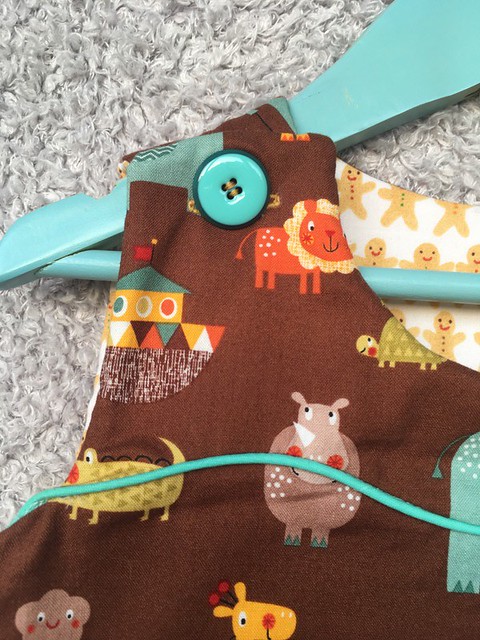
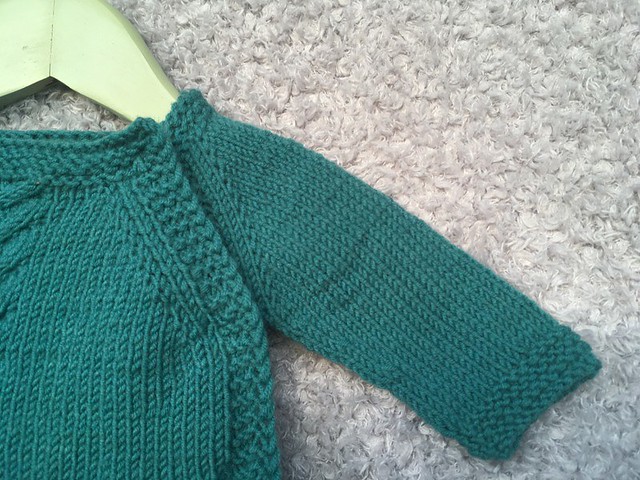
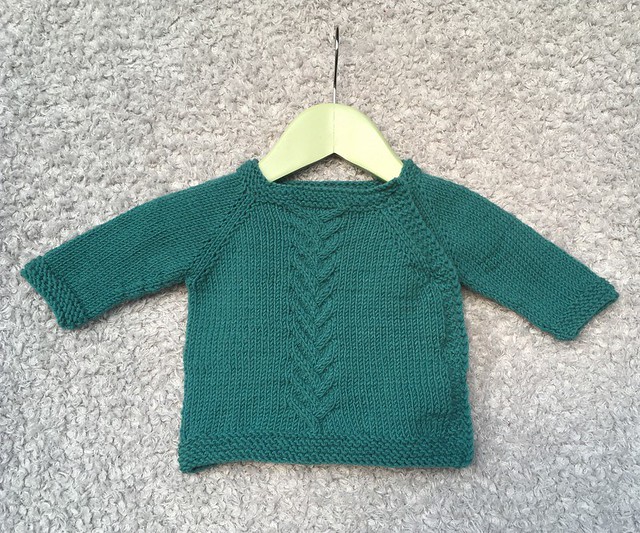
Thirdly, I’m so pleased with my colour matching of the different elements. Early on I chose the elephant as the element I’d try to match to, and it was so pleasing to find the perfectly coloured piping, buttons and even a hanger (!) to bring the whole ensemble together. Not to mention the cardigan in matching yarn and a store-bought pair of tiny little coordinating pants (more on that to come in the next post).

And finally, though you cannot see it on the finished item at all, I learned how to piece together small scraps of wool batting to use them up fully rather than throwing them away. A little googling led me to some helpful tutorials, and I was wonderfully surprised by how easy it was to do. It meant that I was able to make this sleep sack with the batting leftovers from the first one, meaning I can make two sacks out of one package of batting. And from the outside you cannot see any difference whatsoever. Functional, economical and avoiding waste. Awesome.

Apart from the organic wool batting, I used organic Cloud 9 cotton for the two fabrics, and I was particularly happy to finally be able to use the gingerbread men print I’ve had my eye on since 2015! Aren’t they adorable?

All in all, an extremely pleasing project which brought me as much joy to make as it did to the now family-of-three when I finally delivered it to them last weekend. And one thing’s for certain – it won’t be my last Lua sleep sack!

a baby surprise

A very good friend of mine is currently pregnant with her first baby. While in my own country it is very common not only to learn the gender of the baby, but also tell everyone the chosen name months in advance of the birth, in my years of living among people from all corners of Europe I’ve learned that this is more the exception on our continent. Many many people decide not to find out what they’re expecting, keeping it as a final surprise for the birth, and my friend decided to do the same.

34269694560_9f910c061f_z_d

And so, as I scoured my pattern library for ideas, I thought to myself, what better pattern to make for a surprise baby than the baby surprise jacket. This pattern is so legendary that it’s difficult to find a knitter who hasn’t at least heard of it, and for good reason. It features an ingenious construction which is extremely simple to execute, while at the same time feeling totally impossible to conceptualise. As long as you trust the pattern, you’ll be fine. More than fine. You’ll end up with a miracle of a sweater. I am so pleased with how mine turned out, and I’ll definitely be making more.

33845163453_92c9e47004_z_d

Another pleasing element of this project was that it was made entirely from stash. At first I wasn’t quite convinced about my colour combination, but it was what I had so I decided to plug along. Now that it’s finished I’m totally in love with the colours and find them just perfect for either a boy or a girl.

34269694870_5f784eb74a_z_d

As my friend (who is also a knitter) was always admiring the knitted toys I made, I couldn’t resist using the opportunity to amp up the cuteness element and add an Elijah elephant in matching colours. He is quite possibly the cutest thing I’ve ever made, even if I say so myself! This was also the best written toy pattern I’ve knitted from thus far, extremely precise and with clever construction ideas.

34269693990_c481db3425_z_d

The sweater and the elephant travelled to London today to await patiently for their surprise baby to arrive. I’ll be waiting here in Brussels, and since patience isn’t my strongest suit, I might just whip up another knit or two to pass the time more easily… :)

34269695330_da7f88df02_z_d

my first afterthought heel

I’ve wanted to try knitting an “afterthought heel” ever since I first heard of this intriguingly named construction technique. In essence, socks are long tubes of plain knitting, broken up by one bit in the middle which requires concentration and skill. Don’t get me wrong, I love heels, I think they’re all sorts of magic and I love trying out different ways of doing them, but the truth is, they can be fiddly, they require that you look at your knitting and concentrate, and somehow the need to knit them usually seems to appear at the most inconvenient time, like just when you’ve plonked yourself down in front of the latest episode of your favourite tv show and you just want some plain mindless knitting.

Well, what if you could move that fiddly bit to whenever it suits you best, rather than interrupting your smooth knitting when the sock tells you to? That’s exactly what an afterthought heel does. It lets you put in a sort of placeholder (a line of waste yarn) in the sock, where the heel will go, and go on with knitting your plain tube. You can return to your heel and complete it whenever you feel like it. The added bonus is that it helps maintain even stripes on striped socks.

33267755636_68c3bdedbc_z_d

So, after years of knowing all this in theory, I finally tried it out in practice last week, and I’m pleased to report it was simple as pie and worked just as I had imagined it. Yay for afterthought heels!

As for the rest of this project, I’ll show and tell you more when I’ve finished the second sock. No one has yet invented a magic cure for Second Sock Syndrome, unfortunately… ;)

Mister Flamingo goes to ballet school

Knitting… It’s amazing how, after all these years, it still surprises and amazes me so often. Take this project.

32465645974_5cde55fe2a_z_d

It was started almost four years ago, as an idea at the stich’n’bitch group I was attending at the time. We were meeting up in a cafe called ‘Flamingo’, someone had come across a free flamingo pattern on Ravelry, one thing led to another, and all of a sudden we had all cast on to knit flamingos in honour of our host location.

32465645224_d3e815fb11_z_d

Shortly afterwards, however, I stopped going to the group. It was nothing dramatic, other commitments came up, habits changed, you know, life happened, and it just didn’t fit any more. The half-baked flamingo sunk deep into my haberdashery drawer and was forgotten.

32465645584_e37e32a977_z_d

Except here’s the thing, I’m one of those people who likes to Finish Things. Whether it’s a conversation or a book or a knitting project, it really really REALLY bugs me to leave something unfinished. So for all those years this little flamingo was nagging at my subconscious, the little loose end which just wouldn’t go away. So, finally, a few weeks ago, just to get it out of the way, I decided to finish him. I did not expect to like the process, or the finished product. To be honest, the work in progress looked kinda ugly. And I’m not particularly into flamingos. I just wanted to get it over with.

32465645794_c72b424635_z_d

And here we come to the surprise and amaze part. I finished the flamingo last week. I wound in the seemingly hundreds of ends. I awkwardly and asymmetrically attached the pieces to the body. I stung myself with a needle a bunch of times and cursed under my breath.

32494053013_9656082d10_z_d

And then I looked at the flamingo – and in a split second, I was utterly in love. All of a sudden, I found this little dude perfect and adorable and squishable and lovable. I wanted to show him to everyone I know. I wanted to take photos of him in every room of the house. I wanted to invent stories about him going to ballet school…

32465646174_55663bb53b_z_d

The same little dude that I finished just to get it over with.

Such is the magic of knitting. Such is the magic of Making.

32494053343_d4f64133d6_z_d

Welcome, little friend.

p.s. Happy Women’s Day, everyone! :)

the home stretch

Old WIPs have been instrumental in my return to knitting (and crocheting). I have a few rather large projects which have been siting in a 70%-finished limbo for quite a while, and it was precisely that feeling of “oh they’re almost done, you just need to go for the home stretch” that made me feel empowered enough to tackle them (yes, empowered – the immensity of projects can be truly intimidating sometimes!). It worked for my beautiful sweater, and now it’s working for another, even bigger project.

In fact, at first glance, this seems like a tiny thing.

31728039624_3c251647da_z_d

But add a lot of tiny things…

32531015296_ba43d0bf34_z_d

…and you get one gigantic, ever-gowing thing.

32531015506_2d7e374162_z_d

When it’s finished, this will without a doubt be the biggest project I’ve ever conquered. That remaining pile of circles still looks a bit scary, but I’m so close now that I can almost smell the end! I can’t wait to show you the finished product!

the trouble with sock sizing

Here I am, sitting with my two favourite books on socks, both informative, educational, detailed, well thought-through. And yet, they are both utterly useless in helping me out of my conundrum. You see, I’m knitting socks for my mum, whose foot size is totally different from any of the feet I have close to me.

31629840123_b666d770af_z_d

And yet, the thorough introductory sections and the 38 patterns included in these two books all say the same: Work even until the foot is approximately xy cm shorter than the desired finished length. Assuming, of course, that you have the foot at hand and can therefore easily slip the sock-in-progress on and check them against your desired finished length. So what if you don’t?

32441512905_9f0af3ae89_z_d

Is there a better answer than the only one that comes to mind now, which is try to eyeball it and keep your fingers crossed until December, when I plan to hand over loads of socks to loads of family members (as a surprise), all with vastly different foot sizes? Is there an obvious thing I’m missing? Or a magical chart somewhere on the internets that will tell me everything I need to know, if only I’d be bothered enough to google for two minutes? Help!

32290365892_f9dc6a6abb_z_d

p.s. This is another pair of plain vanilla socks knit from the toe up, in the magnificent
Ancient Threads Sockittome Select, one of my all time favourite sock yarns.

the socks that started it all

Here they are, the socks that reminded me that knitting socks is easy and that I love it.

For this first pair, I kept it simple and easy – the so called “plain vanilla” socks: all stockinette, no special features, letting the yarn tell its own story. For these kinds of socks I usually turn to Wendy Johnson’s Socks from the Toe Up book, which helped me make my first steps in sock-knitting and remains a trusted resource. While I have nothing against cuff-down socks, toe-up knitting can be really handy in certain situations, for example when you’re not sure how much yarn you will have exactly. You get the non-negotiable part of the socks (i.e. the length of the foot) knit first, and then for the cuff you can just keep knitting until you run out of yarn.

I really love that Wendy presents a number of different toe and heel techniques, and these kinds of simple socks are perfect for experimenting and finding your preferred option. For these socks I went with the short-row heel, which I think of as “the standard” heel type. The finished heel was fine, but I did find the process rather hard on the fingers (lots of tight wraps to pick up and knit), so it’s not my favourite heel type.

Further experiments in sock construction techniques to come…

a year of socks

Towards the end of last year, knitting slowly crept back into my life. I was enjoying this resurgence of my old passion, so as I packed my suitcases for a week off at my parents’, I was eager to bring some knitting along as well. What’s easily transportable (my suitcase already bursting at the seams with xmas gifts) and easy to work on (i.e. won’t distract me from participating in all the family chatter going on), I thought? Socks, of course.

So I pulled out a ball of sock yarn from my stash, checked my trusty reference books, and did the fiddly part of casting on, so that in the midst of the family hubbub I could simply dive in to some mindless knitting. I saw this as a sort of experiment for my hands, which had struggled with RSI for a long time, but seemed to be doing ok lately. If they could handle a week of almost daily knitting on teeny tiny needles, we might be getting somewhere. I approached it cautiously, but enthusiastically.

And it worked just fine. Not only did my hands not complain too much, but I also rediscovered that funny thing about socks. You know, that thing about how they seem sooo scary (the fine yarn, the small needles, the complex construction elements), but then you knit one and remember that it’s mostly just knitting a rather small tube of stockinette, with a little shaping in the beginning (toe) and middle (heel). It’s what I love about socks.

And so, having come back home in the last days of 2016 with two socks almost finished in one week, somehow the decision was already half formed in my mind before I even articulated it. 2017 would be my year of socks. I would work from my stash, experiment with patterns, and see where it got me. Mostly, I would have fun.

So here we are. Two pairs are already off the needles, and will be making an appearance here soon. But if I was to have a year of socks, well, then surely I deserved a little treat to properly show them off when they were done. And I’m even knitting from stash so I’m not spending any money on yarn. Surely that should be rewarded, I reasoned. A few clicks around Etsy and I ended up with these beauties. I absolutely luuuuurve them and I’ll be putting them to good use this year.

Stay tuned :)